Week 10 & 13: Output devices- input devices
We began by talking about microcontrollers and the different types there are. They can be used on the PCB boards. Some microcontrollers that are common and that we have interacted with are Adafruit feather, Arduino uno, and raspberry pi. We then went over electronics basics as we have before, including concepts of charge, voltage, and Ohm’s law. We then went over output devices including types of motors like stepper motors, servomotors, and DC motors. After the spring holiday break, we discussed the other end, input devices. They are basically sensors that take action on information gathered and convert that into information in another fashion, usually as a number. Systems send information to a sensor, then computer (or anything with a microcontroller), digitalising a physical phenomena. We discussed sensors with the example of arduino, where one state is 0v ground (low) vs. 5v (high). A pull-up resistor can pull up the line to 5v so there is no floating state between. We discussed analog vs. digital, where analog can display more values. Finally, we learned about capacitive sensing, which is really cool because you can essentially make a sensor out of anything with a send and receive pin. One resource for this is sparkfun.com
Key takeaway: Sensors, even if simple, can be powerful devices for translating and interpreting information.
Moment of!: Capacitive sensing seems to make sensors seem like magic and extremely interactive as seen in the “noisy jelly” project we were shown.
Assignment: You remember when you had to DESIGN A PCB for week 6? “design a pcb for an input or an output” now it is time to fabricate it ( finish the design - mill it - solder it) Make the PCB you designed real and make it work ( you have from these week until INPUT WEEK- included)
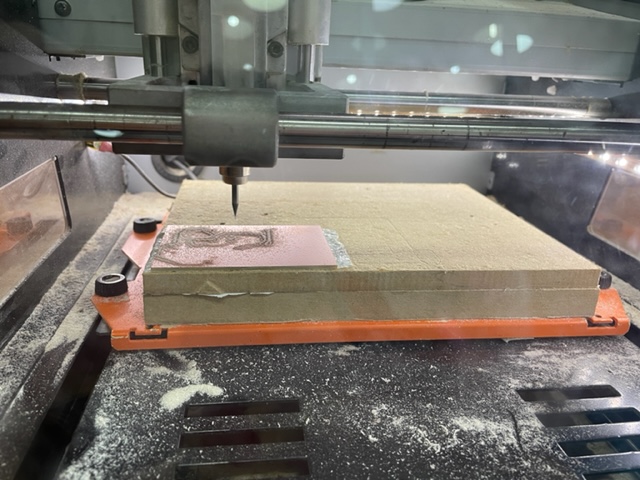
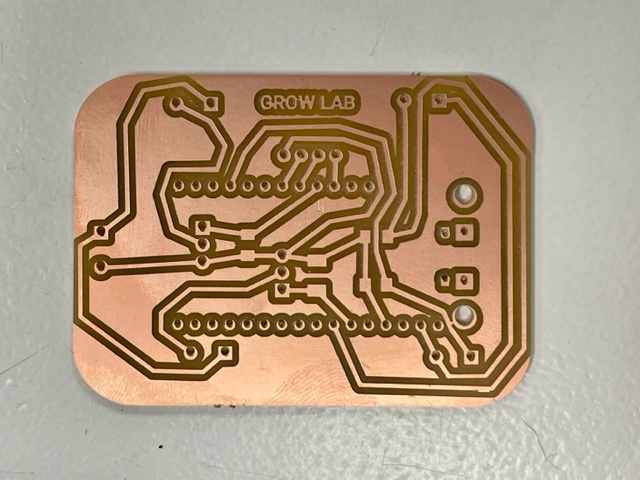
Followed from week 6: electronics design. The PCB was designed to control the photobioreactor and decrease the number of cables needed to control the air pump, peristaltic pump, LEDs, and sensors. With Paula’s lead, this file was taken and turned into an image that can be processed for milling. The image was then placed into Maud’s project to begin milling, inverting the image and preparing G-code. Next, the correct end mill was chosen, 1/64 for traces and 1/32 for the holes. The copper and substrate board needed to be taped to the base of the milling machine evenly and at the corner. The milling machine must also be calibrated properly beforehand and cleaned to ensure the mill starts off cleanly. After milling the PCB, we soldered it with all of the correct parts. Once the PCB was ready to go, we wired the remaining components and got the code working so that it could function. It was exciting to see the LEDs turn on, and pumps sound on in their alternating patterns.

Week 14: Network and communication
These protocols are used to copy information between two places by sending bits. Networks can be seen as tubes and communication as flow. The network typology is how communication happens, defined by shape. It is important to remember that they are imperfect and will fail at some point or other. Wired communication happens through cables, voltage change signals 0 or 7. It can happen synchronously, a cable line in a consistent way or asynchronously like ringing a bell to listen. With synchronous communication, there is a master-slave relationship with devices where one gives direction and one listens. Wireless communication has different levels of range and penetration to earth’s atmosphere based on frequency. Antennae create a sort of sphere where 3 axes are used to cover a broad range.
Key takeaway: networking and communication in the electronic realm isn’t so different from what you would think of in the social context.
Question: what applications are better to use bluetooth vs. wifi?
Moment of !: The reason why your phone dies faster when you’re far from an antennae is because you are increasing the intensity that you are emitting.
Assignment: Send a message between two microcontrollers (boards). The task could be done by pairs. Communication can be done by cable or wireless.
Week 15: Interfacing and application programming
This subject was useful in learning how we could use coding in a different, more creative way. We learned about tools for prototyping including processing, which is an integrated development environment (IDE) and graphical library, and p5.js which is a web-based version of processing and uses a javascript library to create interfaces. We discussed tools for IoT design of A-frame and JSON. In terms of serial communication between the arduino and a computer to send information bit by bit, you might want to send as little data as possible so that it stores faster. On the other hand, if it is a data based business, you might send as much data as possible. In general, the simplest path creates the least problems. We then went through a p5.js demo where we programmed a moving ball. We could easily adjust color, size, and speed was adjusted using the frame rate. Going through the demo was fun as you could quickly see the output of your coding. Finally, we had a blender with python demo from Victor.
Key takeaway: Interface and application programming can translate data to the user in a more visual, appealing way.
Question: when might python be more useful than javascript and vice-versa?
Moment of !: Tools like p5.js make it easy for designers and people who aren’t super sexperienced in coding to get into creative coding.
Week 16: Wildcard week
Wildcard week was a fun week to get into because it was more open-ended and a chance for us to learn about alternate fabrication techniques. We finally got to learn information from Edu about using the robotic arm that we have been seeing the whole year. He explained to us the functions of the robotic arm, and how it works on a 6-axis manipulator. Because of this, it has a very wide range of motion. It was very helpful for me to understand when compared to a human arm and how it works in a similar way. The main things to ensure when working with the robotic arm are to check for precision and repeatability, and know the printing speed. We then went through kinematic principles. The robotic arm works with planes instead of points. The joints are somewhat limited, so the robot works to move in the most efficient ways to get from point A to B. After the class in the morning, we learned about working with composites. We watched the demonstration of using burlap with epoxy resin to make a skateboard deck. In order to mold the plastic film, the vacuum press was used. The layers were carefully placed one atop the other and then brushed with the resin. We discussed the difference between resin types, and how bio-resins, while made more responsibly in production, have a similar output as non-bio as they are hard to degrade.
Key takeaway: The robotic arm works similarly to a human arm and creating with the robot has similar advantages and uses as a regular 3D printer but on a larger scale.
Question: How can making composites be less wasteful when it comes to the film being used?
Moment of !: The company Mataerial has created a printing material with thermosetting polymers that harden quickly and allow for anti-gravity printing. It can essentially print in the air and watching a video of the process was impressive.
Assignment: Design and produce something with a digital fabrication process (incorporating computer-aided design and manufacturing) not covered in another tasks.
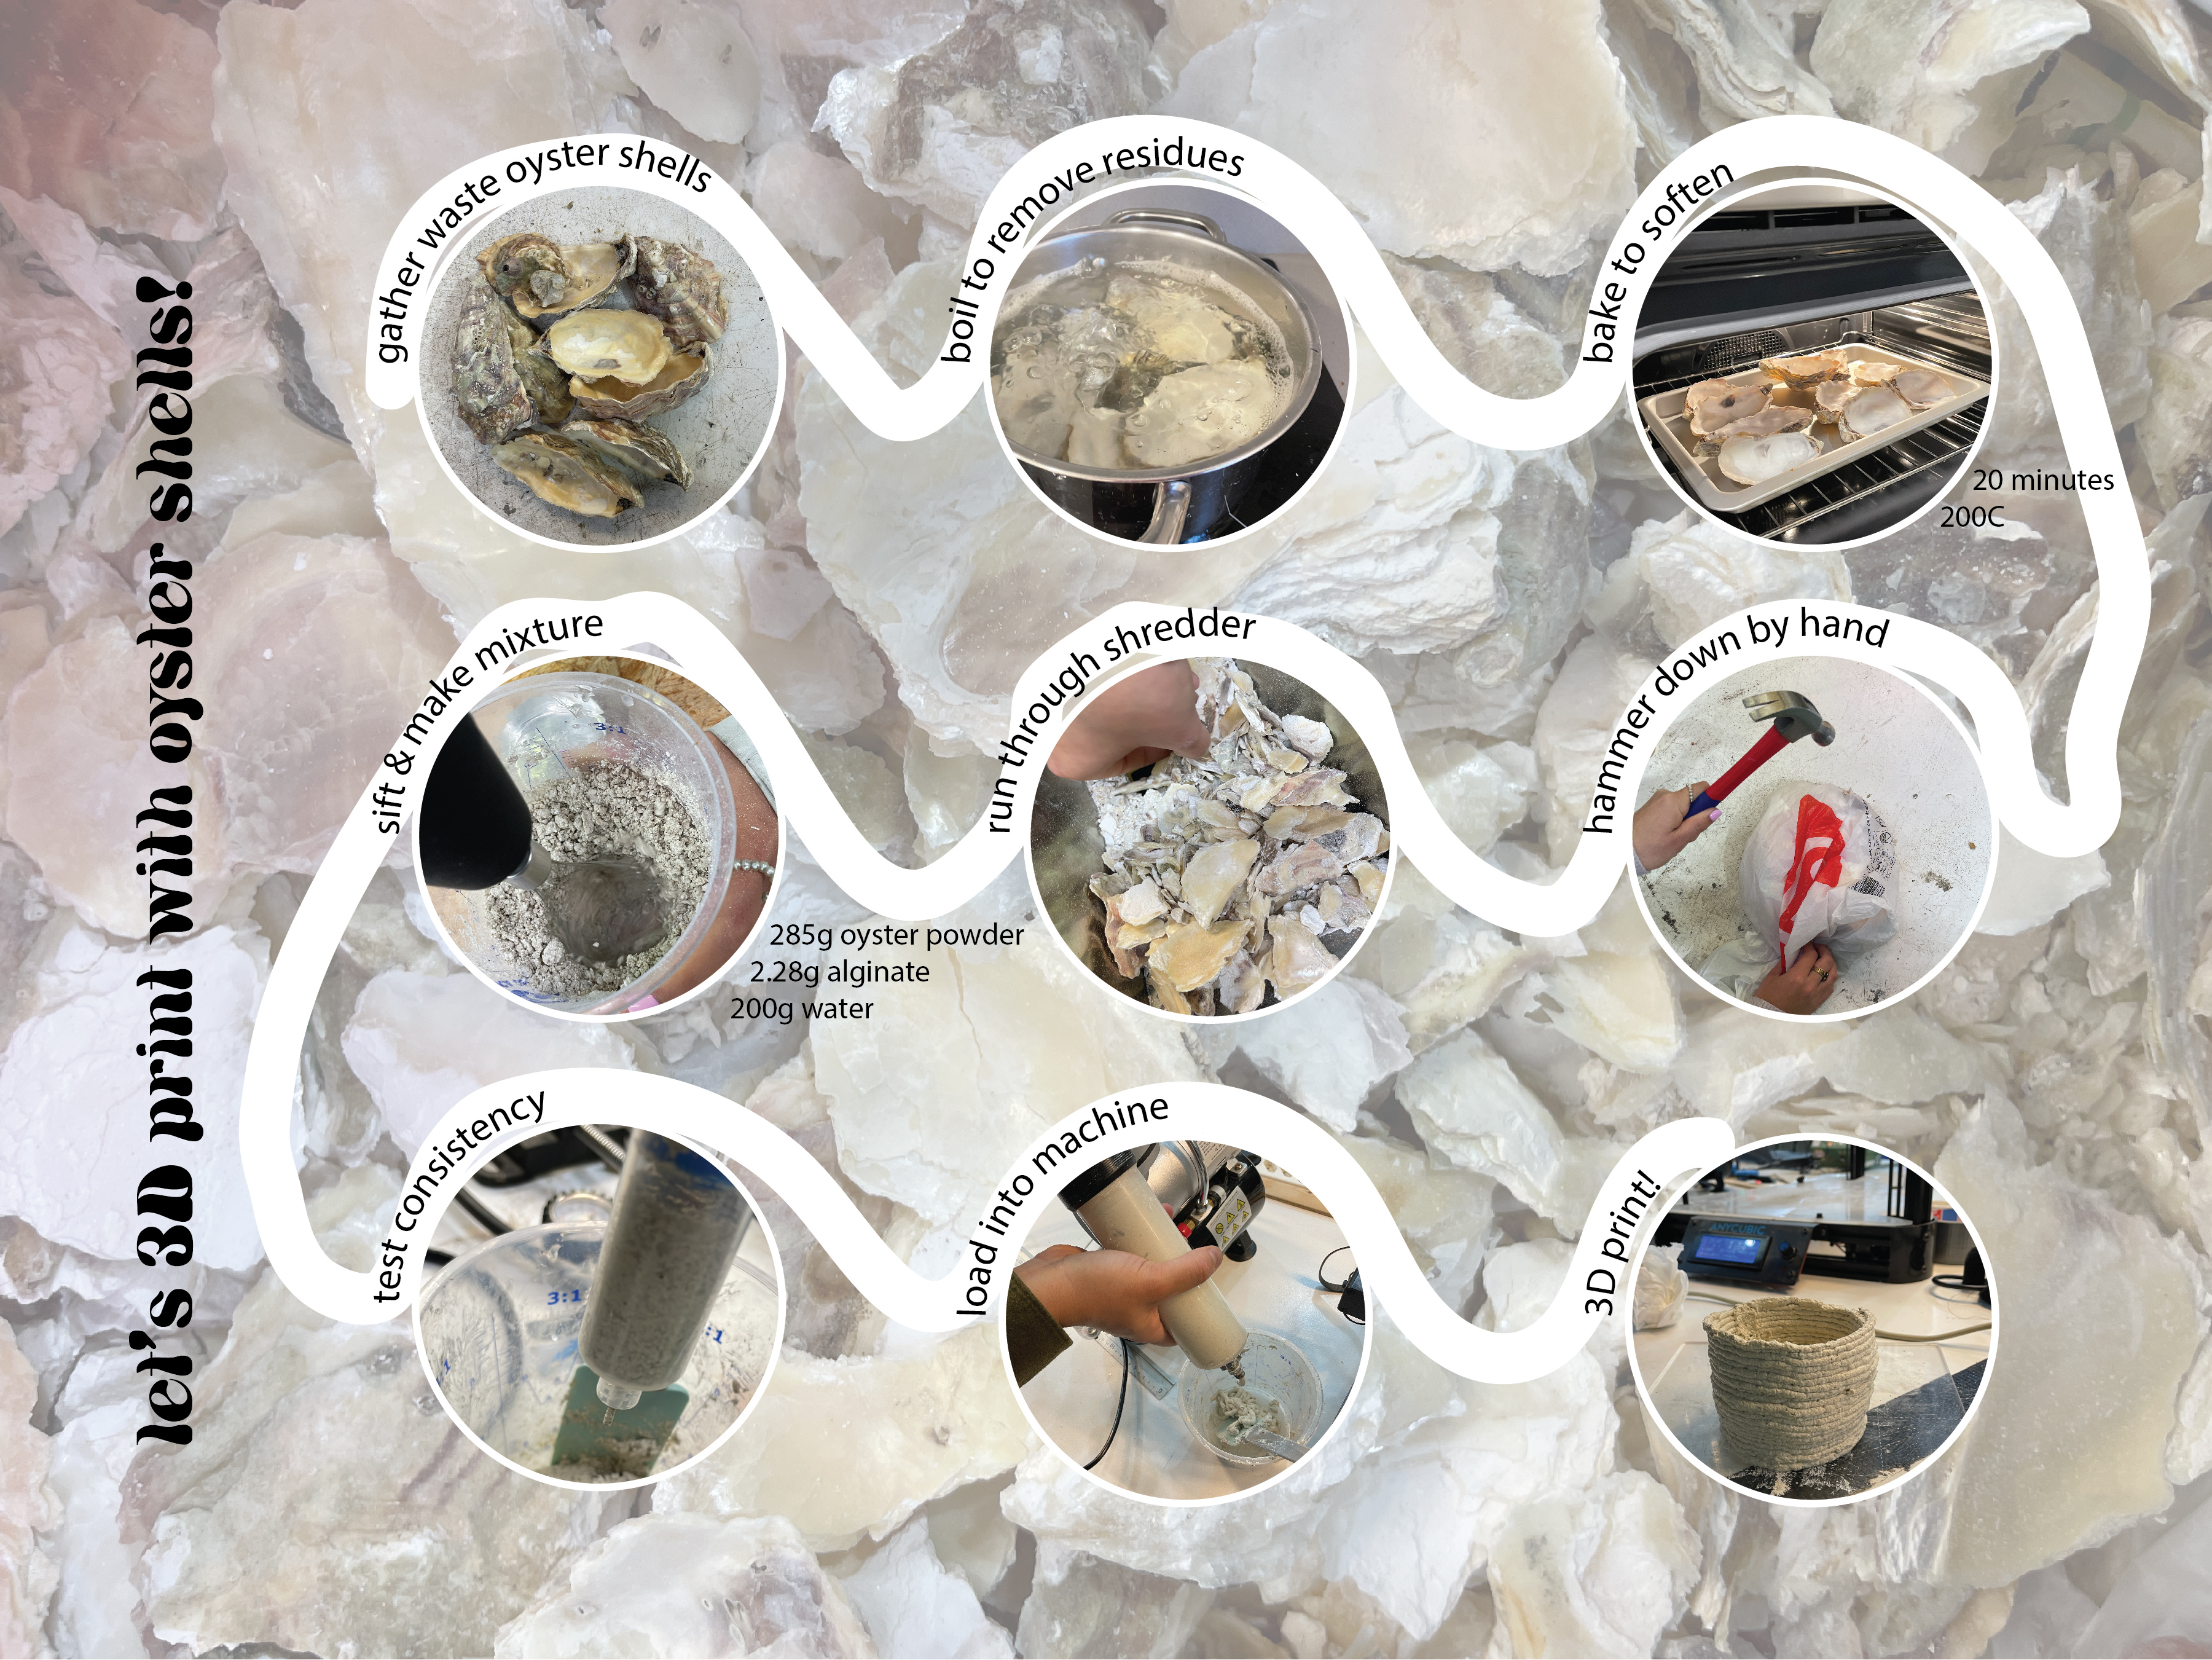
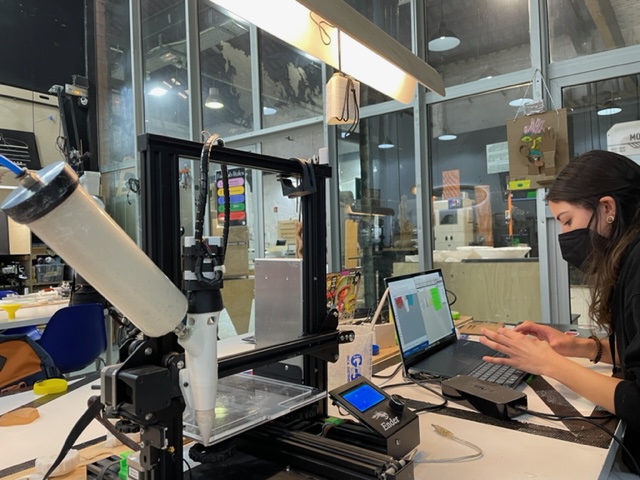
This project was very exciting because I had the chance to continue part of a project from the first intervention which was bioremediating with oyster and mussel shells. Because we were finished with that intervention and had waste shells, we wanted to try 3D printing using them as a material. To be able to print with a material like this, we had to use the paste printer. These machines work in a similar manner to the other 3D printers, but need the material to be inserted and have the particular consistency that is not too thin or thick. In order to make the paste, we followed the process below from raw oyster shells to final printable paste material. The original recipe from materiom we based our off of was to use 1 powder: 4 water (98%) and alginate (2%). While testing with this, we found we needed to add much more water to form a malleable paste and ended up with the final recipe in the diagram.
In order to test the paste consistency, we used a smaller tube with pressure. However, in the end the nozzle was too small (much smaller than the nozzle on the 3D printer) so we were unable to push the material through, and the result was us adding a bit too much water into the mixture. At first, we tried to use the Ender printer which offered more accuracy but with higher risk. Since it was our first time testing with this type of printer, we decided to test with a simple shape. We used a simple cylinder and sliced it in rhino using grasshopper files from FabLab with the pufferfish plugin to turn it into slices. The parameters we used were 0 on the Z axis, 3 for the width of the nozzle opening, 2.5 slicing distance, and 2.5 on infill. While using this machine, we encountered a lot of problems with the pressure and material coming out the sides, in which we ended up breaking the 3D printed part above the nozzle!
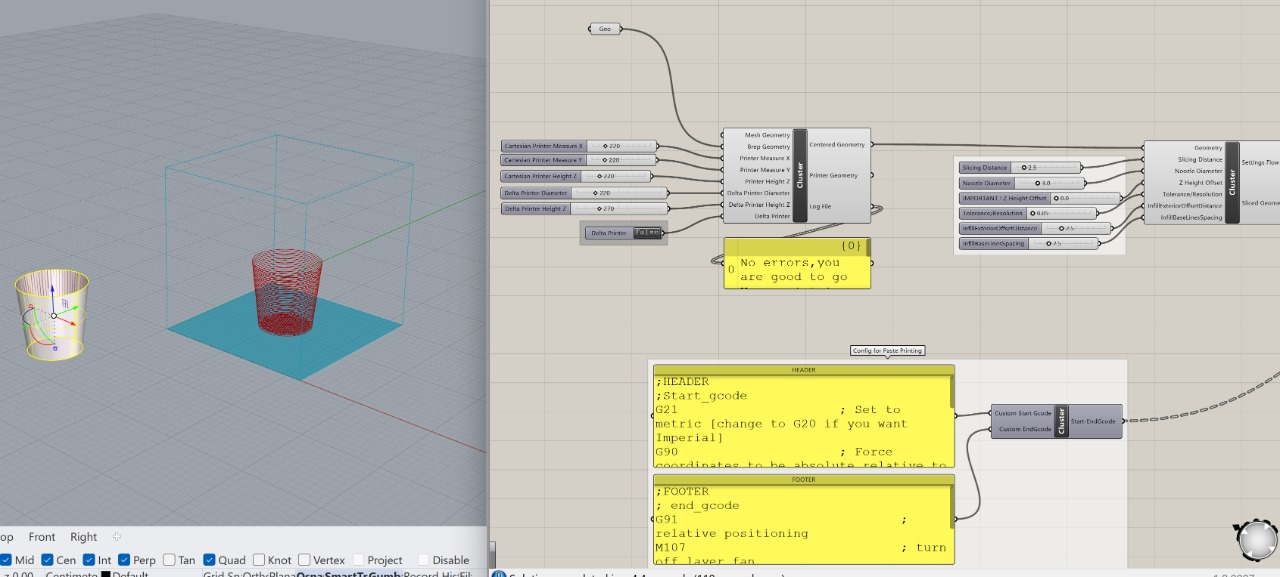
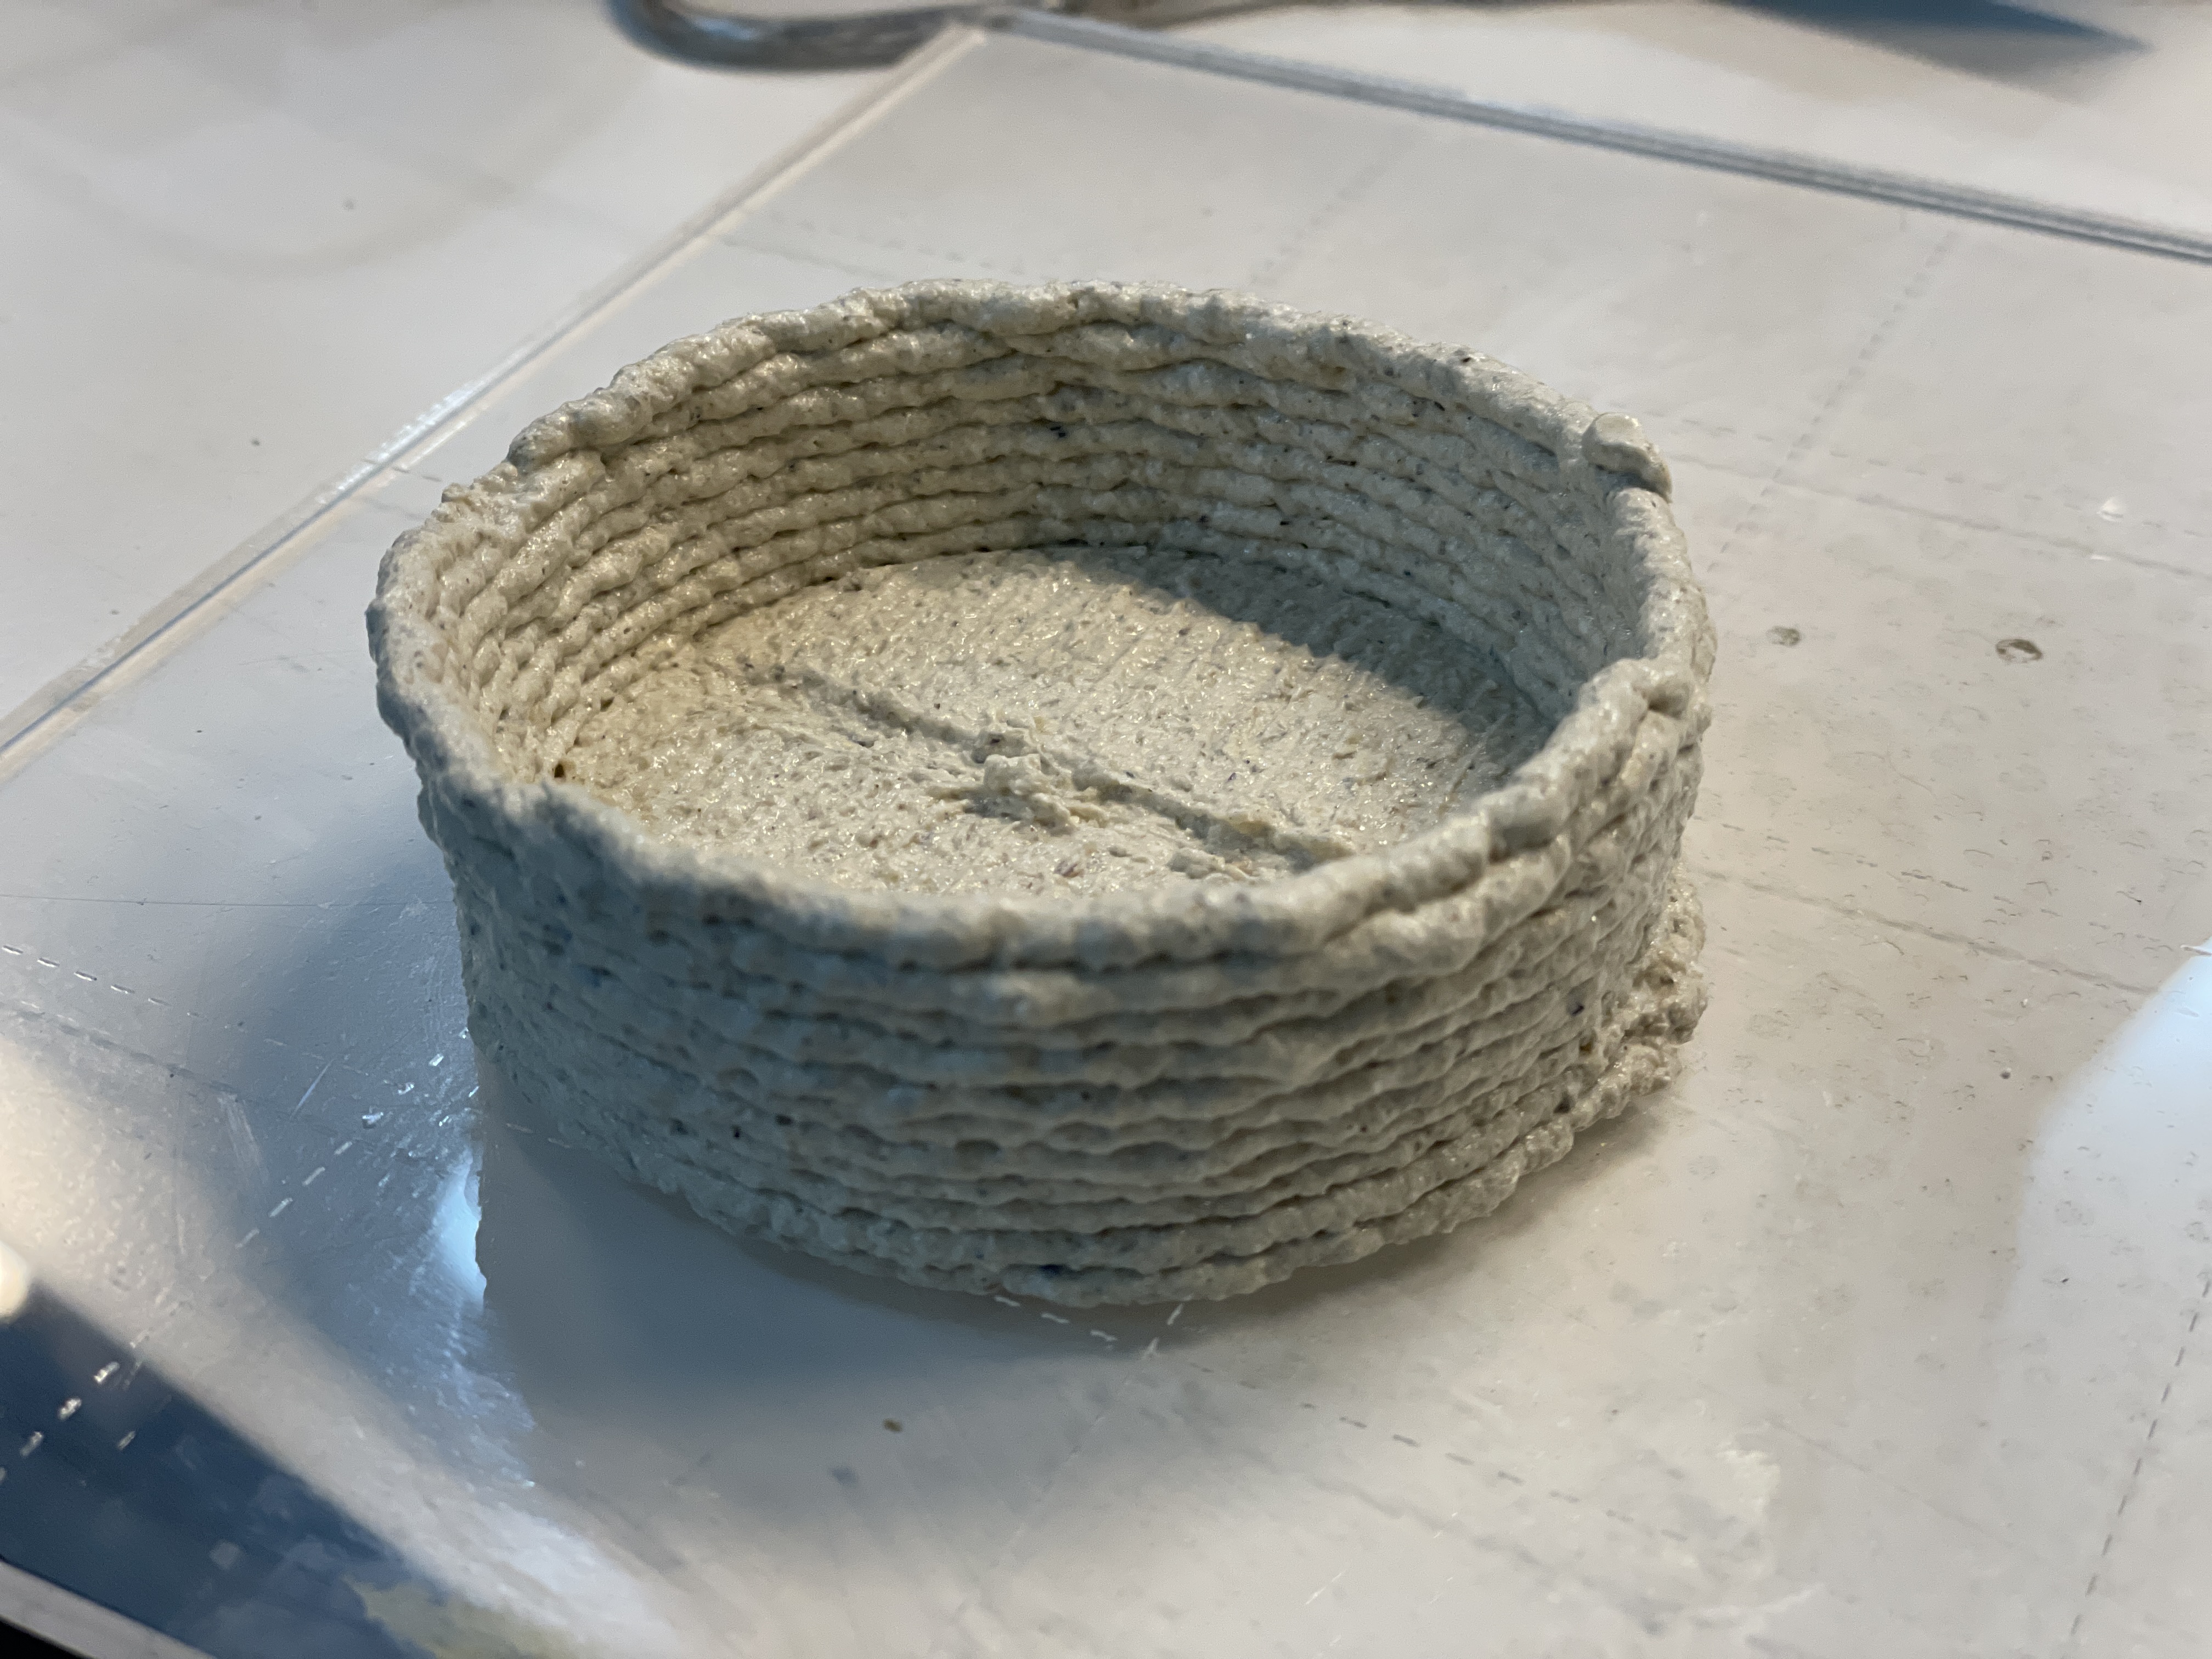
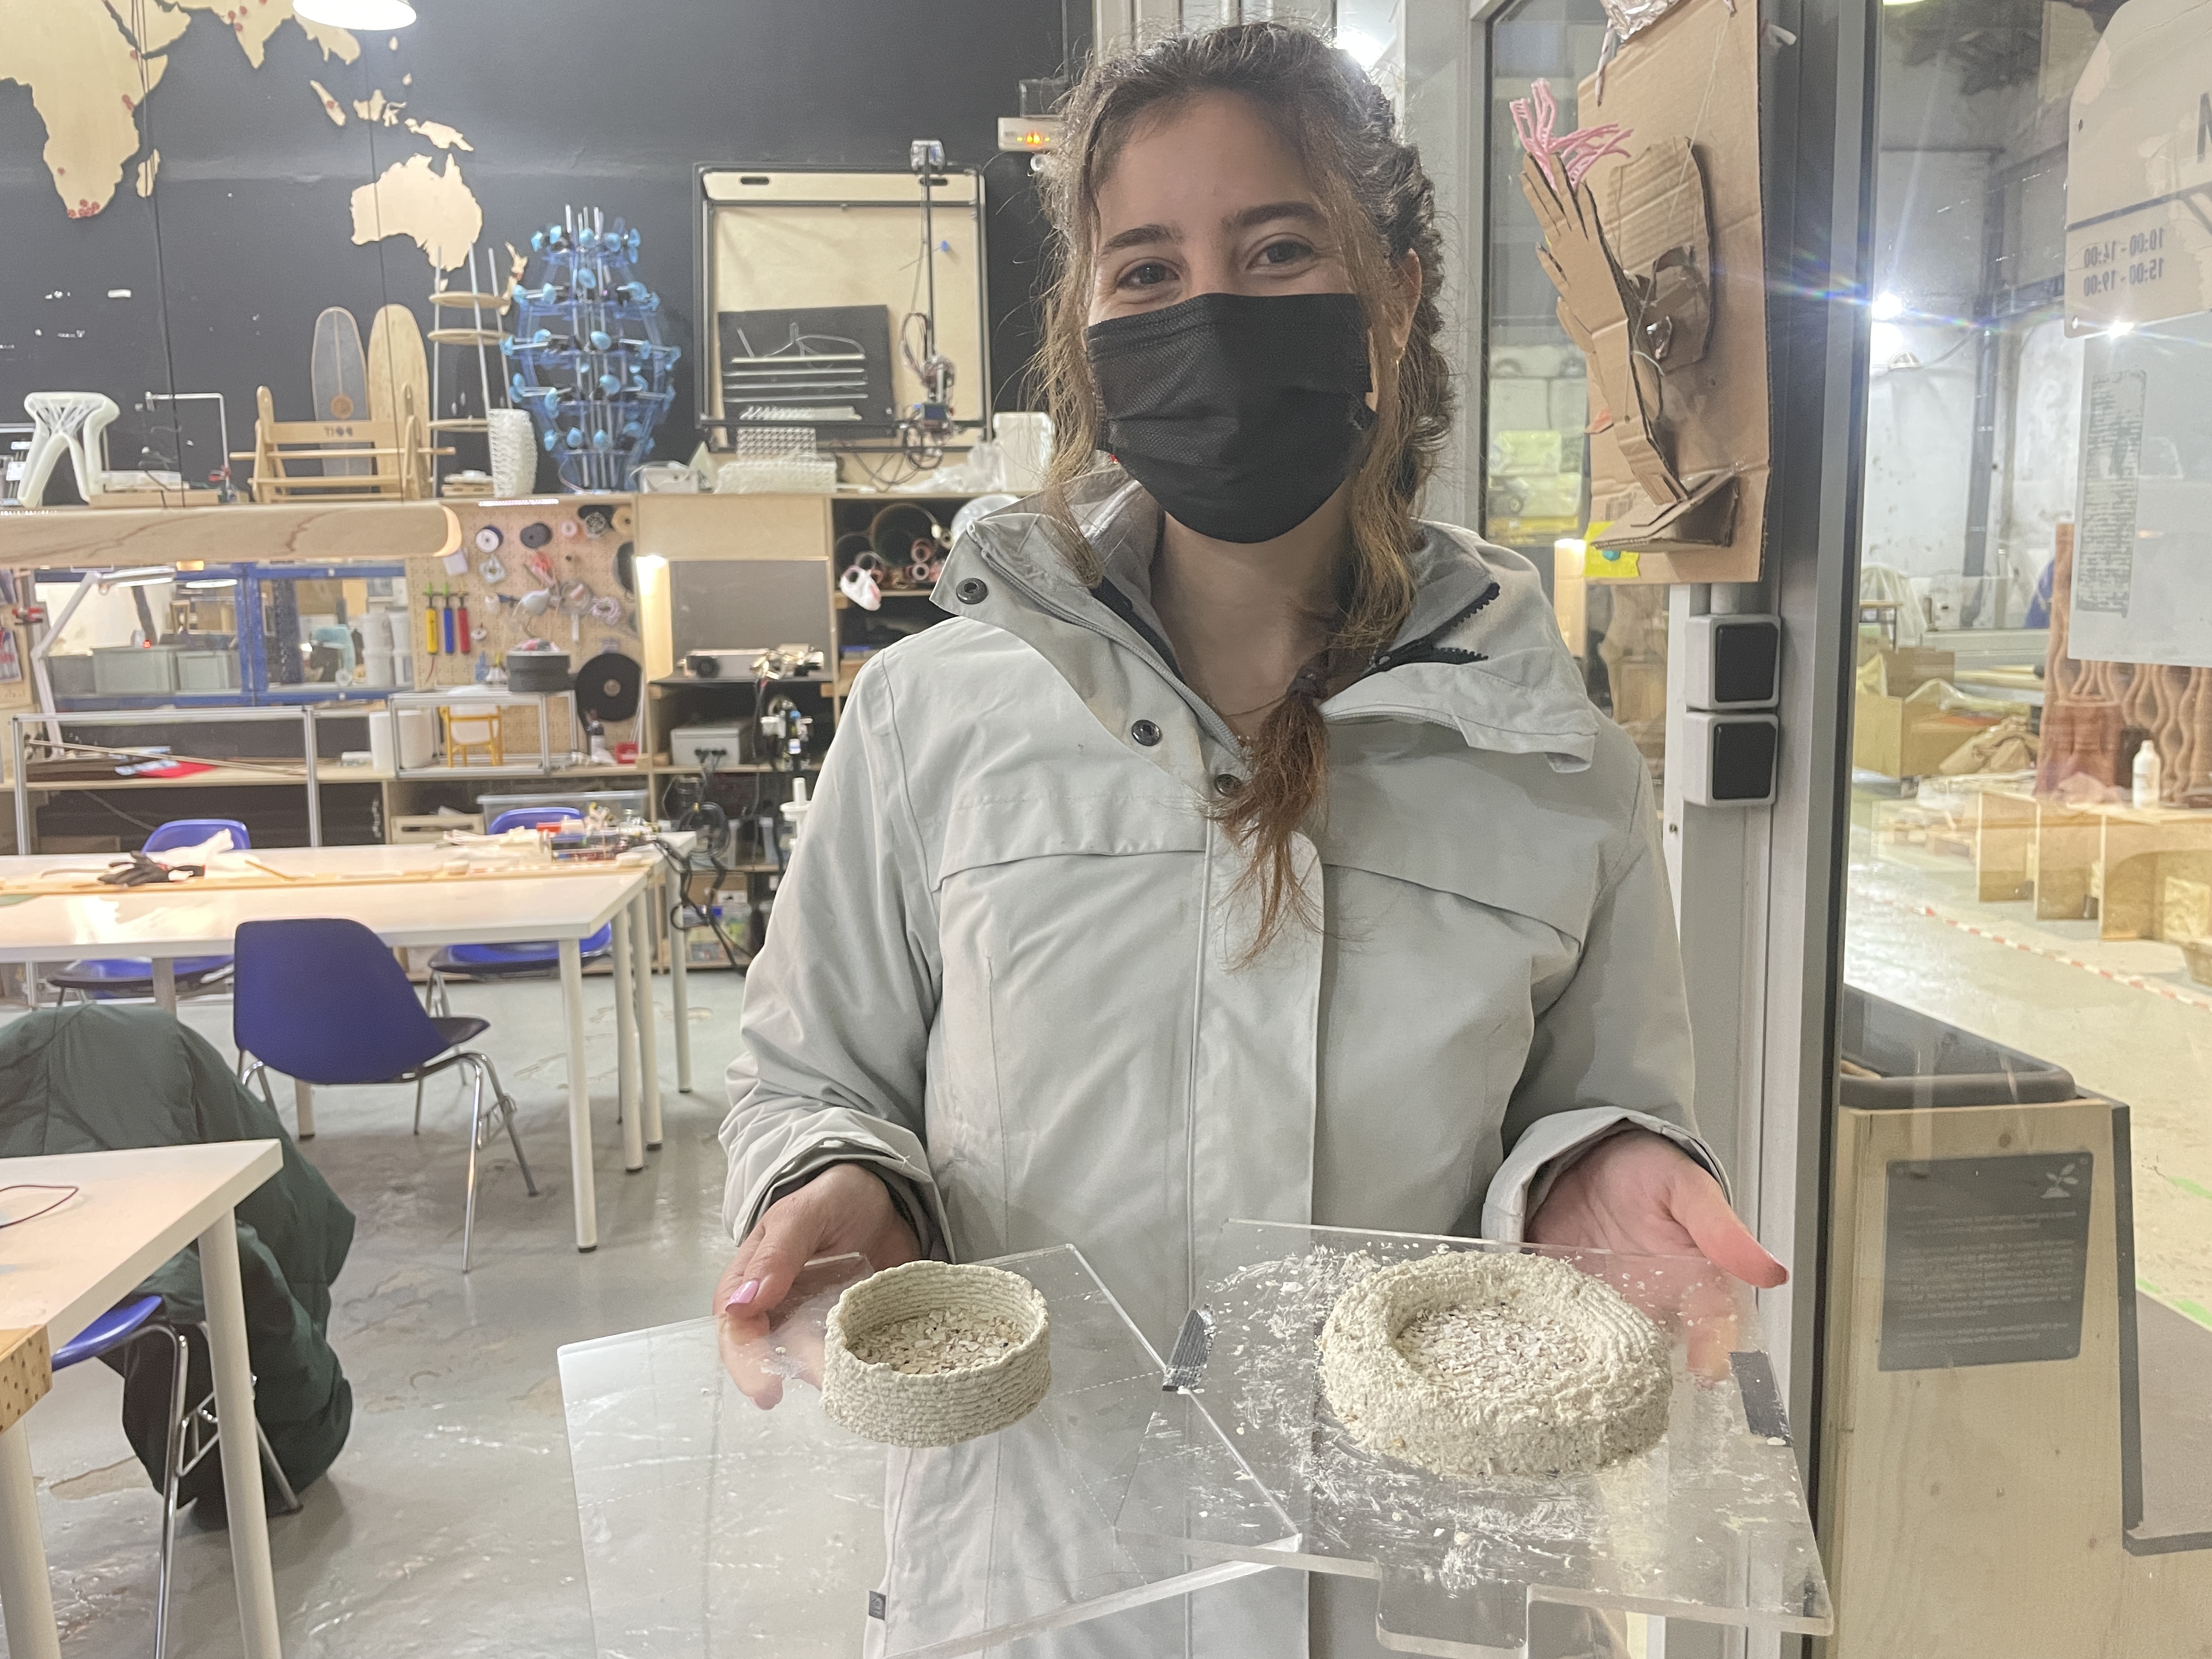
We then decided to switch over to the Kossel printer. We downloaded Kossel for grasshopper and Repetier to make the process easier with interacting with the machine. This machine was easy to use and we transferred our file with the new code. The only tricky part was making sure the nozzle was at the right height just above the plate of the printer at a Z value of -19. With this test print, we tried to allow the material to build up into a higher vase. Once we hit a certain height threshold, it started to become very inconsistent and after attempting to fix it a bit with our hands it collapsed. The final products were still really interesting and it was a process in which we learned a lot.
Week 17: Application and implications
The main objective of this week is to begin focusing on your final projects and interventions, defining the scope and developing a project plan for the rest of the course Some of the questions you should reflect on it and answer in your website are as follows.
When thinking about this task, I will be speaking about my most recent project, the bio-based mycelium shoe.
WHAT WILL IT DO?
The shoe aims to serve as an example, prototype, and exploration of what alternatives for traditional shoes and their plastic-based material makeup and components. It engages another living species, mycelium, and harnesses its power to help mitigate anthropogenic problems.
WHO'S DONE WHAT BEFOREHAND?
I have seen much to do with using mycelium as a leather to create bags and garments such as the company mycoworks. When I thought of the idea, I did some research to see to what extent it had already been done. While I saw a few examples. One using animal hair as the upper part of the shoe, I thought it was a good idea to try to make my own.
WHAT WILL YOU DESIGN?
Together with Julia Steketee, we designed a shoe that exemplifies all that we believe in when thinking about this topic. For the purpose of developing it in the time span that we had, we found it would be more impactful to have an artistic than super functional and durable shoe. The latter part would come with more time and testing, but first we needed to see for ourselves, and for the public what is possible.
WHAT MATERIALS AND COMPONENTS WILL BE USED?
Materials used for shoe and wearables; mycelium substrate from grown bio, alginate , spirulina and wool based bioplastics, alginate and food waste bioplastics, 3d printed growlay filament (for growing seeds). Materials used for molds and trays: PLA 3D printed filament, waterproof fabric, wooden frames.
WHERE WILL IT COME FROM?
The traditional PLA, mycelium, and bioplastic materials we were able to source from the fablab (thank you!), although I think some of it had been purchased from Quimics Dalmau. I purchased the growlay from filament2print.com. Waterproof tablecloth fabric was purchased from my neighborhood fabric store ribes casals.
HOW MUCH WILL THEY COST?
Collectively, I am unsure how much the total amassed to because Julia and I were sourcing things from different places, and were able to get some things for free. However, in a joint splitwise Julia and I made for the production of the shoe with larger things added, we have spent about 75 euros.
WHAT PROCESSES WILL BE USED?
Molding and casting, 3D modeling, laser cutting, 3D printing, using hand tools.
WHAT QUESTIONS NEED TO BE ANSWERED?
How could these materials be produced at a larger scale? How can they perform over time? What is their durability? How can the process of growing mycelium be better controlled in terms of sanitary/contamination? Are all of these materials sourced resourcefully in the first place?
HOW WILL IT BE EVALUATED?
We are currently in the process of seeing how the shoe will turn out. Part of the fun (and stress) is that we don’t have full control over how or the speed at which the mycelium will grow. To me, the success will be if the shoe comes together and visibly is appealing, and seems viable as a piece of apparel that someone would wear. Then, it should be tested by users.
Week 18: Invention, intellectual property and income
For the last and final week of fab academy, we took a slightly more business-minded approach with talking about invention, intellectual property, ownership, and income which is a different side to the topics we would normally discuss in these types of classes. We did an exercise which involved coming up with a longer-term strategy plan for the fab lab’s smart citizen kits, which are kits that measure and collect data via sensors.
The following is a discussion of the future plans for my final project.
The shoe and bio-wearables produced as part of this fourth micro-challenge will be displayed and present for use at a final showcase entitled Symbiatipico, located at Atipico restaurant and cultural event space. More than to generate a future business, the project aims to provoke conversation surrounding circular materials, question current production practices, and project ideas for a more sustainable future for items with short life spans.
One on end, we want users and the general public to become intrigued and interested in the topics we present. By having them directly engage with tangible objects, it puts them in a space where what we are suggesting can become reality for an evening. We would assume that many young adults would be present, which we hope can bring these ideas into their daily lives.
In tangent, we will be speaking with other designers, students in art/architecture/design, and professionals engaging with innovative projects. We would like to reach them through this event by having discussions with them, proposing ways to work collaboratively, and pushing ideas of interdisciplinary work. For these stakeholders, our goal would be to engage directly with them and continue the conversation, while potentially inspiring people to view the alternative presents as feasible and incorporate them into their design and research practices.
In my dream scenario, I would be working with companies, collectives, and studios focused on regenerative materials, changing habits, and searching for answers for more circular fashion. In the coming year once MDEF finishes, I would like to take my first step towards that here in Barcelona. MDEF has emphasized to me the importance of building communities, so I hope to continue building these by having conversations during our Symbiatipico event, and beyond. This final project that I’m working on is revolving around a shoe. Though I wouldn’t narrow my focus specifically on only shoes, I would not complain if at some point I could be working with a big name brand such as adidas in creating products like the one I am trying to imagine. Even though big business is so often a problem, I think seeing change in big companies is important to create social change in the public, and I would like to be a part of that shift.